

Things you will need!
1. Sander
2. Sandpaper
3. A GREAT oil based primer
4. Charcoal chalk paint
5. Stencil Brush (Go FANCY or go SIMPLE) I couldn’t tell the difference.
6. Stencil!
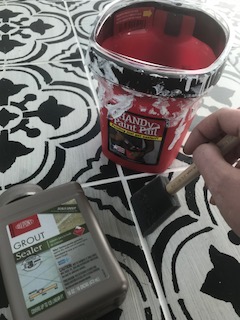
7. Floor Poly for finish!
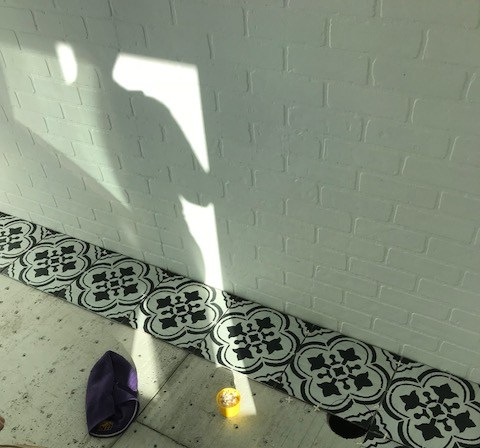
8. The cheapest tiles you can find at your local hardware store. I got mine for 69 cents a piece!
The Process:
- Sand them down. rough them up and try to get the sheen off. Then wipe off. I had an argument with a friend about whether or not sandpaper would actually scratch ceramic tile since it was so tough. I looked it up and ceramic tile runs about a 6 on the Mohs hardness scale, while quartz (what sand is made out of) runs about an 8. Now feldspar is also in sand which runs a 6 on the scale as well. So perhaps he was correct. Sandpaper did get most of the sheen off of the tile which is all I was asking.
- Primer! I used oil based because it’s more durable.

- Stencil! This is where it gets tricky! Now you are probably going to be like me and buy 12″ tiles and a 12″ stencil. There is a difference between the “actual” tile size and the “nominal” size. 12″ tiles ARE NOT 12.” They are smaller and this will mess with the stencil you get. Luckily my tiles still look pretty good put together so this wasn’t an issue. But it might be a problem with other designs. I think the actual tile dimensions were 11″ 13/16ths
- Next you will perform the arduous task of painting in the tiles. This takes by far the most amount of time and it’s important you are careful. If you make a mistake (which I made tons of) they actually blend in really well.
- Let dry, lightly sand to make smooth, and wipe down with wet cloth
- Put on your first coat of poly! It’s going to make the color more bold and the tiles shiny! Instructions say you can put a second coat on without sanding between 2-24 hours after your first application. They also say, it takes 7 days for this stuff to completely cure but only 24 hours before you can walk on it. So plan accordingly! I like poly but I have never been able to stop it from making a million tiny bubbles.

7. Now for the part that requires real skills! Mortaring and grouting! In my shopping cart below, you can see all the things I bought for this project. Flexible thinset mortar. Make sure you get the kind where you can just add water. Some of them require very specific amounts of a different product that is sold separately. Next you will need a diamond blade (I bought one for an angle grinder) to cut tile around my bathroom fixtures, toilet holes, water access points etc… I had to get diamond drill bits for the holes I had to make in the tile for the water access points as well. And with 12″ tile it is recommended you get a 1/4″ trowel to spread the mortar.

8. First, line your tiles up in the room of choice with desired spacers in between. This will give you a good idea where everything should go and what and where you need to cut.
8. Time to mix your mortar! It is recommended that you put water in first and have someone continually stirring while you pour the mortar in to reduce clumping. The opposite of how you would pour your cereal in the morning. Mix mortar into a bucket until it is the consistency of peanut butter. Now it is time to spread! Lay out mortar onto floor where it is desired (I had great luck doing this with a cheap soup ladle from the dollar tree). Next smooth out evenly and make your ridges with your notched trowel.

9. After this, you need to butter the other side of your tile. Smoothe mortar on the underside of your tile and scrape off with the smooth side of your trowel. This will make your tile stick extra well to your mortar on the floor. (seriously, try to pull them up after you stick them down! It’s hella hard!) After that put some spacers in between your tiles to make sure they are evenly split apart. I used two on each side of the tile because they had a tendency to set a little diagonally too. Even if you use the spacers, this is not a replacement for your eyes and common sense! Make sure your tiles line up in the corners with one another as well as beign spaced apart! Most rooms are NOT square (my bathroom included and this makes tiling very difficult). Clear out any mortar that comes up through the tiles. You’ll want that to be a smooth and even layer of grout soon.
10. Let dry for 24 hours.
11. GROUT TIME!

Grout is about 100 times easier than mortar. Mortar is extremely messy and needs to be really consistent. While grout is pretty messy it seemed to be about 1,000 times more forgiving to little mistakes. I would use sandless grout because I painted the tiles myself and I didn’t want any risks of scratching them. Sanded grout is more durable though so use it if you can. I also used a grout bag because globbing it onto the tile like they did in this video I watched looked terribly messy and I already had dried mortar dust all through my house. I think this method saved on clean up time quite a bit!

12. Sqeeze bag and get grout into cracks as deeply as possible. Go Back with a mortar float and jam grout into cracks using multiple diagonal motions. Then scrape off access grout by scraping float at 90-degree angle. Wait 15- 30 minutes and wipe off with dampened sponge. Don’t worry! Thanks to grout haze you will only have to wipe down your tile 5-6 more times :). That is the worst part.
13. Wait one hour, carefully walk across tile trying not to step on grout lines and wipe again. I did this step 2 more times until it was 2AM and there was STILL a damn grout haze on the tiles! I was nervous it would never come off and I went to bed anyway. I woke up. The grout was nice and dry and I really gave the tiles a good scrub, rinsing the sponge in clean fresh water every time. The haze finally came off 🙂
14. Let grout dry for 72 hours and then put on a grout sealer.
15. After this step, in 4 sweet hours you can walk on your brand new floor as desired! YOU DID IT!
