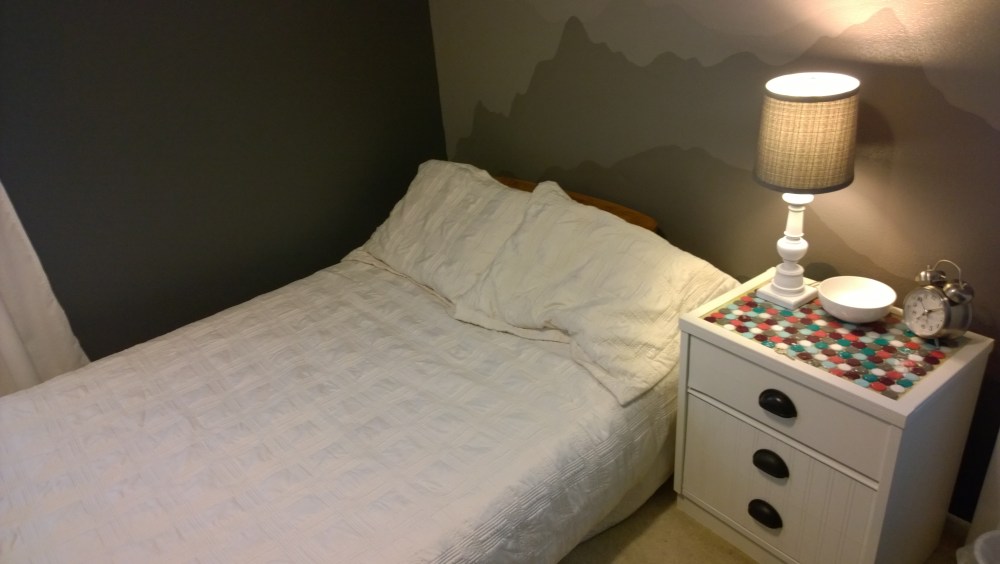
This side table was so ugly that when I went to pay for it at Goodwill the lady said, “Ew, that costs $10? I’m going to give it to you for $5.” And that’s how I got this beauty for the price of a craft beer.

Things I needed!
- High grit sandpaper! All you’re trying to do is rough up the surface so the paint will adhere. As much as sanding sucks and as wonderful as it is to read a blog that says “no sanding necessary,” or paint that says, “will adhere to non-sanded surfaces,” sanding before, and lightly sanding in between coats it is usually necessary for a lasting finish. So put down some newspaper, plastic, or do this outside and get sanding! Take off that crummy hardware while you’re at it! 180 grit sandpaper or higher will do just fine.


2. Wipe it down! Make sure it is completely dry before priming! You can use tack cloth if you don’t want to get your project wet.
3. Since this table did not have a natural lip all the way around it meant I had to create one out of wood. Back in my early days of DIYing I just had a regular hack saw in order to cut wood. This made the projects I could do a little limited. So I found a completely straight piece of trim board, measured everything out 5 or 6 times because I’m an idiot, and I sawed and sawed with my hacksaw until I had four (almost) perfectly measured and mediocrely cut pieces. I ended up sanding the ends for a better fit.
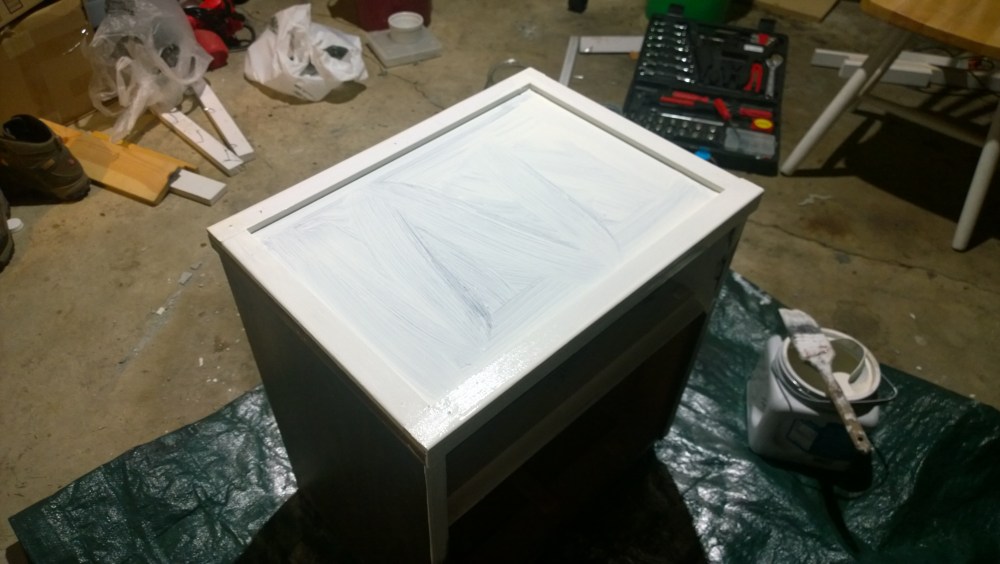
3. Priming and painting. Alright! Since it’s an interior job a primer and paint all in one is all you need! Zinsser, Rust-o-leum, Kilz, and General Finishes are some of my favorite brands! You’ll probably need two coats so make sure to allow dry time and a little light sanding in between.
4. All primed and painted! Good news! While you’re waiting for your dresser to dry start piling up your bottle caps and get them ready for spray painting! You will want bottle tops that are twist of because they will generally not be damaged and will all be uniform when you go to put them on. The only bottle caps that didn’t fit well with other caps were those from New Belgium Brewery. Damn you Fort Collins Colorado!
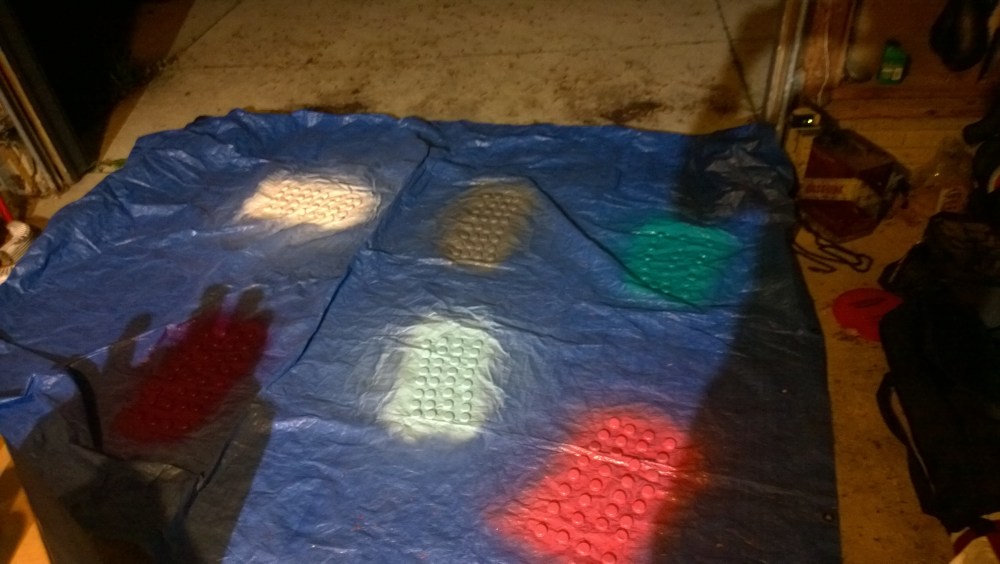
Note: Make sure to get a really good spray paint that adheres very well. (I still like rust-o-leum over Krylon) I noticed some of the cheaper spray paint started to bubble off while the resin was drying. Also, I didn’t know the resin was going to take so long to dry! Do the rest of this project outside!
5. Arrange and glue the colored caps to your table! If I was smarter I would have stopped there. I wasn’t overly thrilled with the way with the cost of the resin (this is sadly as cheap as it gets), the way it dried yellowish, or the fact that it took 48 hours to dry and made the paint on the lids bubble up. But it is a nice durable finish. I would NEVER attempt at using resin indoors. The smell that comes off is intense and, again, it takes a very long time to dry.
6. drawer time! Drawer Time! DRAWER TIME!

By this point you should have taken off the dumb hardware and sanded. However, before we paint I’m going to throw in another step!
7. Fun paint-able wallpaper! Get some and glue it to everything! Use any kind you want! I used this kind for my kitchen cabinets and I had some left over. Sadly, even though it’s wallpaper and should have a natural glue on back I did not think that it adhered very well and I needed additional glue. Anyway, it’s easy to cut out and honestly one roll will last you a long time.
Once that is glued on paint as normal.
8. Cabinet pulls!

It just so happened that the cabinet pulls I bought were the same size as the holes that were already there. Don’t worry, I NEVER get that lucky! I hope the same luck finds you! If they do not measure up I generally put some toothpaste on the screw inserts of my pulls, carefully place them where I want them to go, and drill my hole using the dots of toothpaste as a guide from there.
9. Put a lamp on it, it’s done!